Custom Primer Design
Overview
While there are tools available for automatically designing primers (such as the NCBI Primer BLAST) often specialized PCR applications, such as amplifying fragments for Golden Gate or Gibson assembly or using different polymerases, will necessitate specific primer placements and modifications. In these cases it is important to take extra care to ensure the primers will anneal to the template and amplify well. This page presents guidelines and tools for specifically designing primers from DNA sequences, using the Benchling platform as an example. In short, you will need to:
1) Determine where to place your primers within the template sequence to amplify your desired product
2) Adjust your primer sequences to ideal annealing temperatures
3) Modify the sequences with any necessary adapters and check for inhibitory secondary structures
Designing primers may require trade-offs and revisions to address specific issues that arise during the process. As such it's important to understand the needs of your specific experiment, such as specific locations in the genome, annealing temperatures, and adapter sequences, and keep those in mind while designing your primers.
The examples below illustrate designing primers to amplify the downstream region of the Acinetobacter baylyi ADP1 ACIAD2049 gene for use in Golden Transformation.
1) Determining Primer Placement
I. Start by identifying the region you are amplifying. Some common things to consider are:- Do you need to amplify an entire gene or only a portion, such as the coding region or promoter?
- Is your target in an operon with other genes that could be disrupted by your experiment?
- If you are designing primers to knock out a gene: is it (or an adjacent gene) essential?
- When possible, avoid placing a primer in repeat or low-complexity sequences as they can cause non-specific binding or the formation of secondary structures.
- Larger products will be harder to amplify than smaller products, thus it is a good idea to keep the total amplified area small when possible while still retaining all the sequences you need.
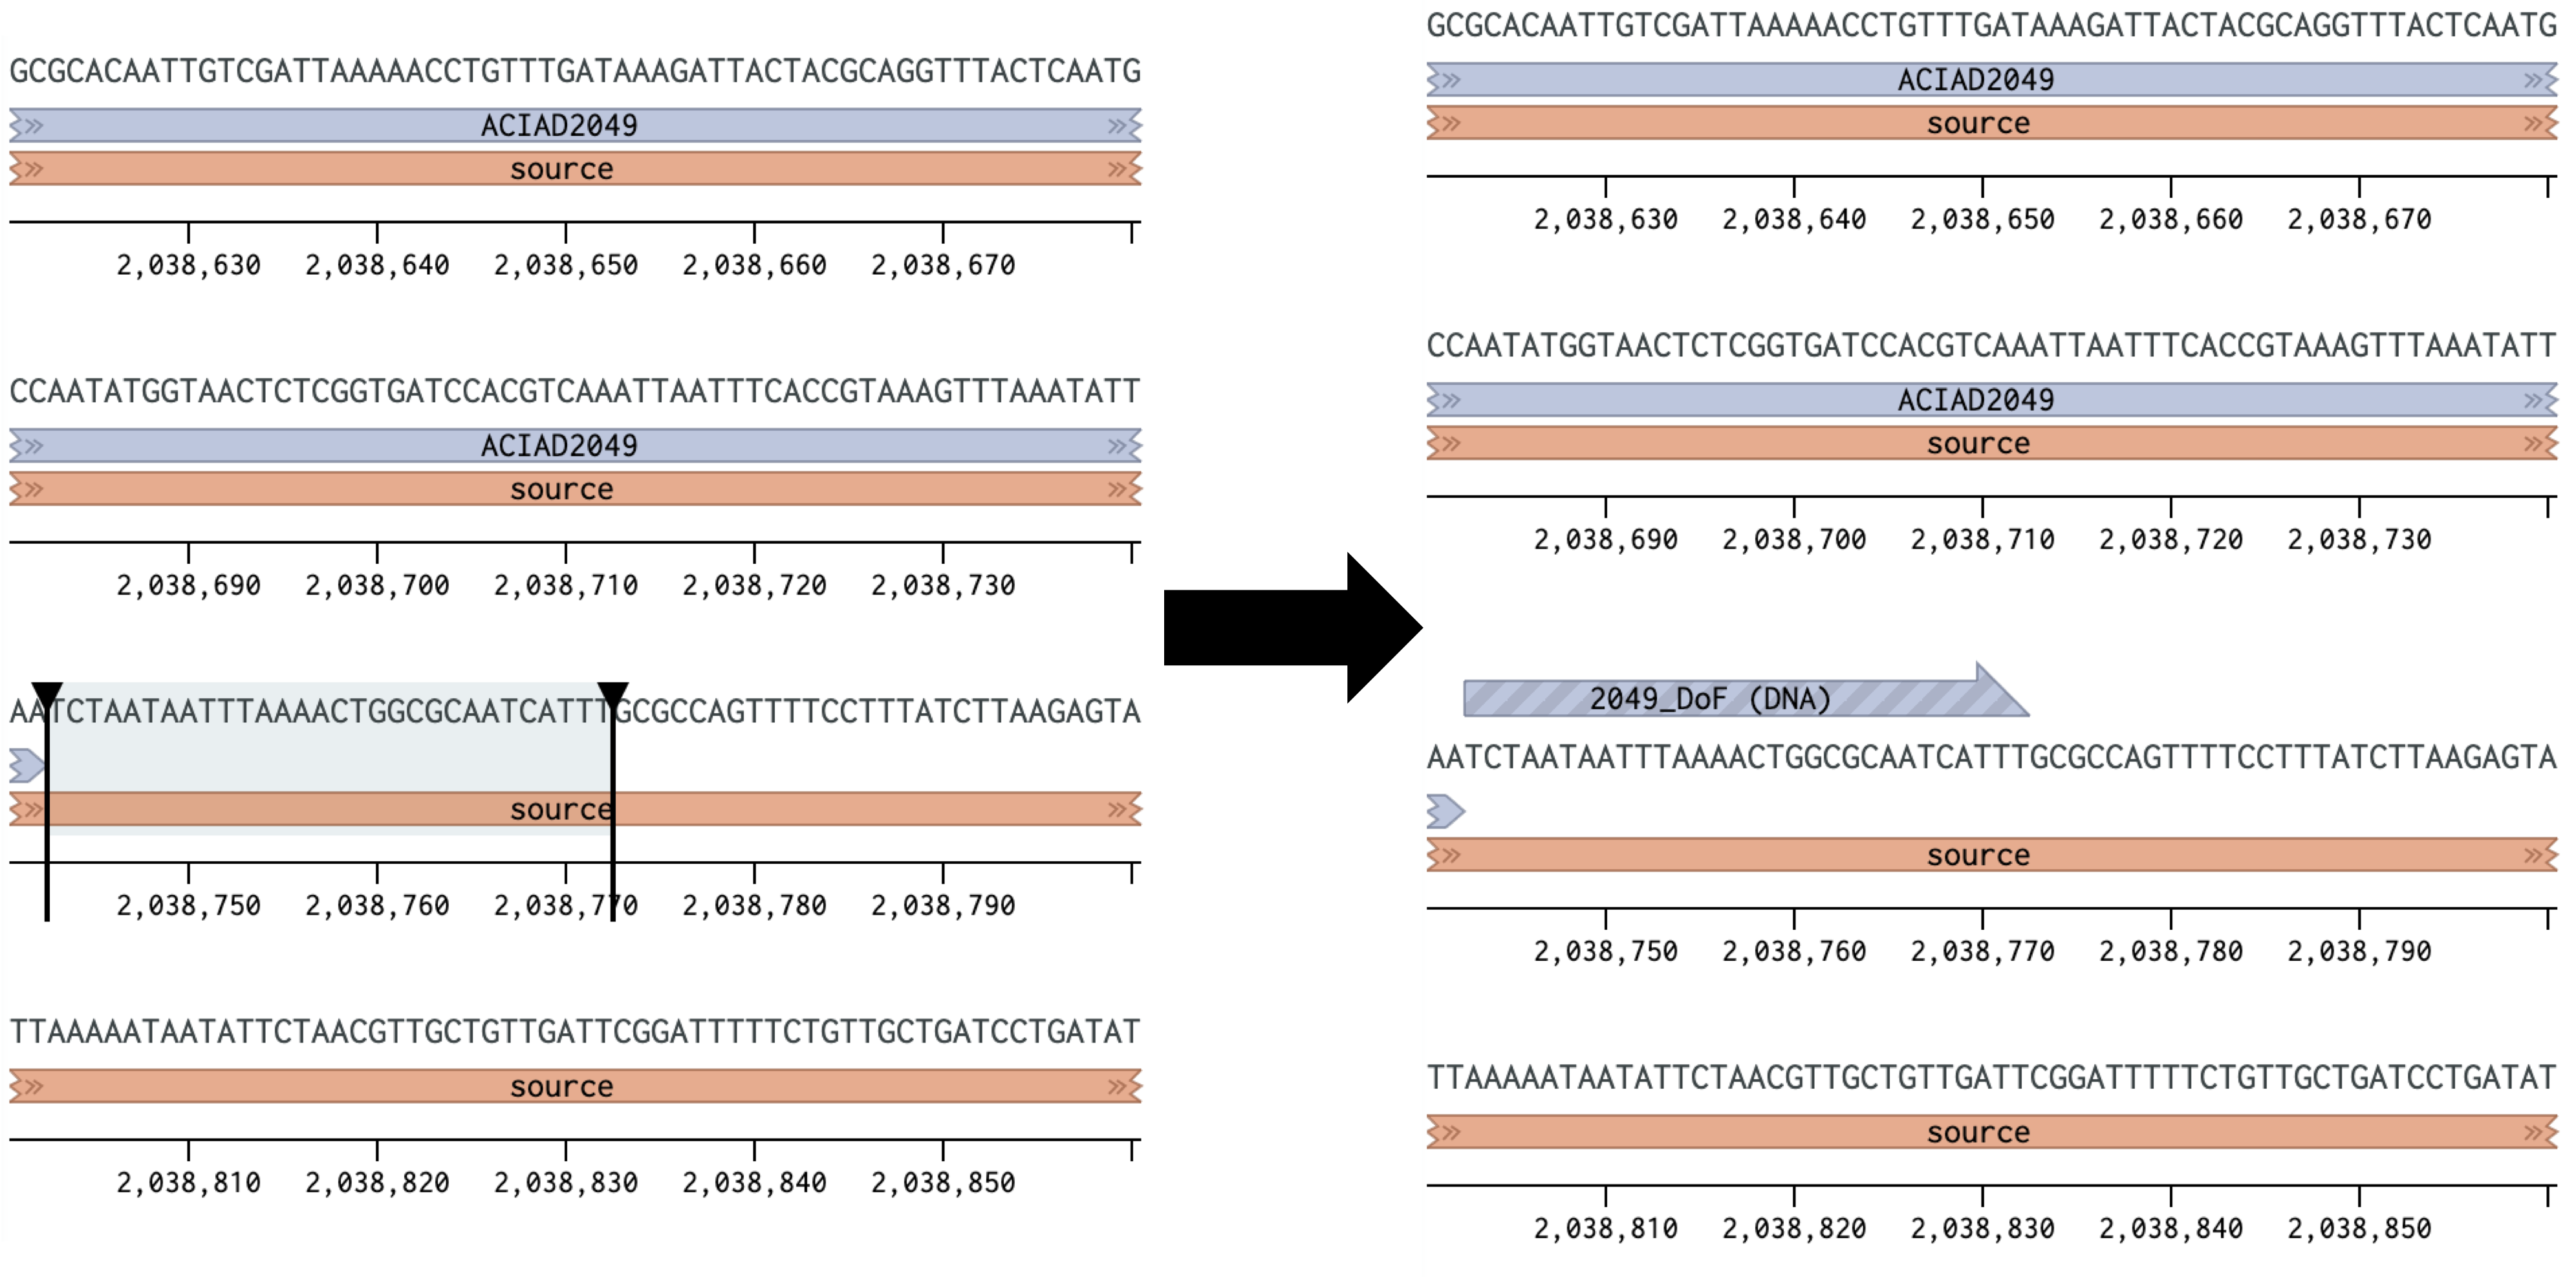
Figure 1 Placing a forward primer downstream of the ACIAD2049 gene.
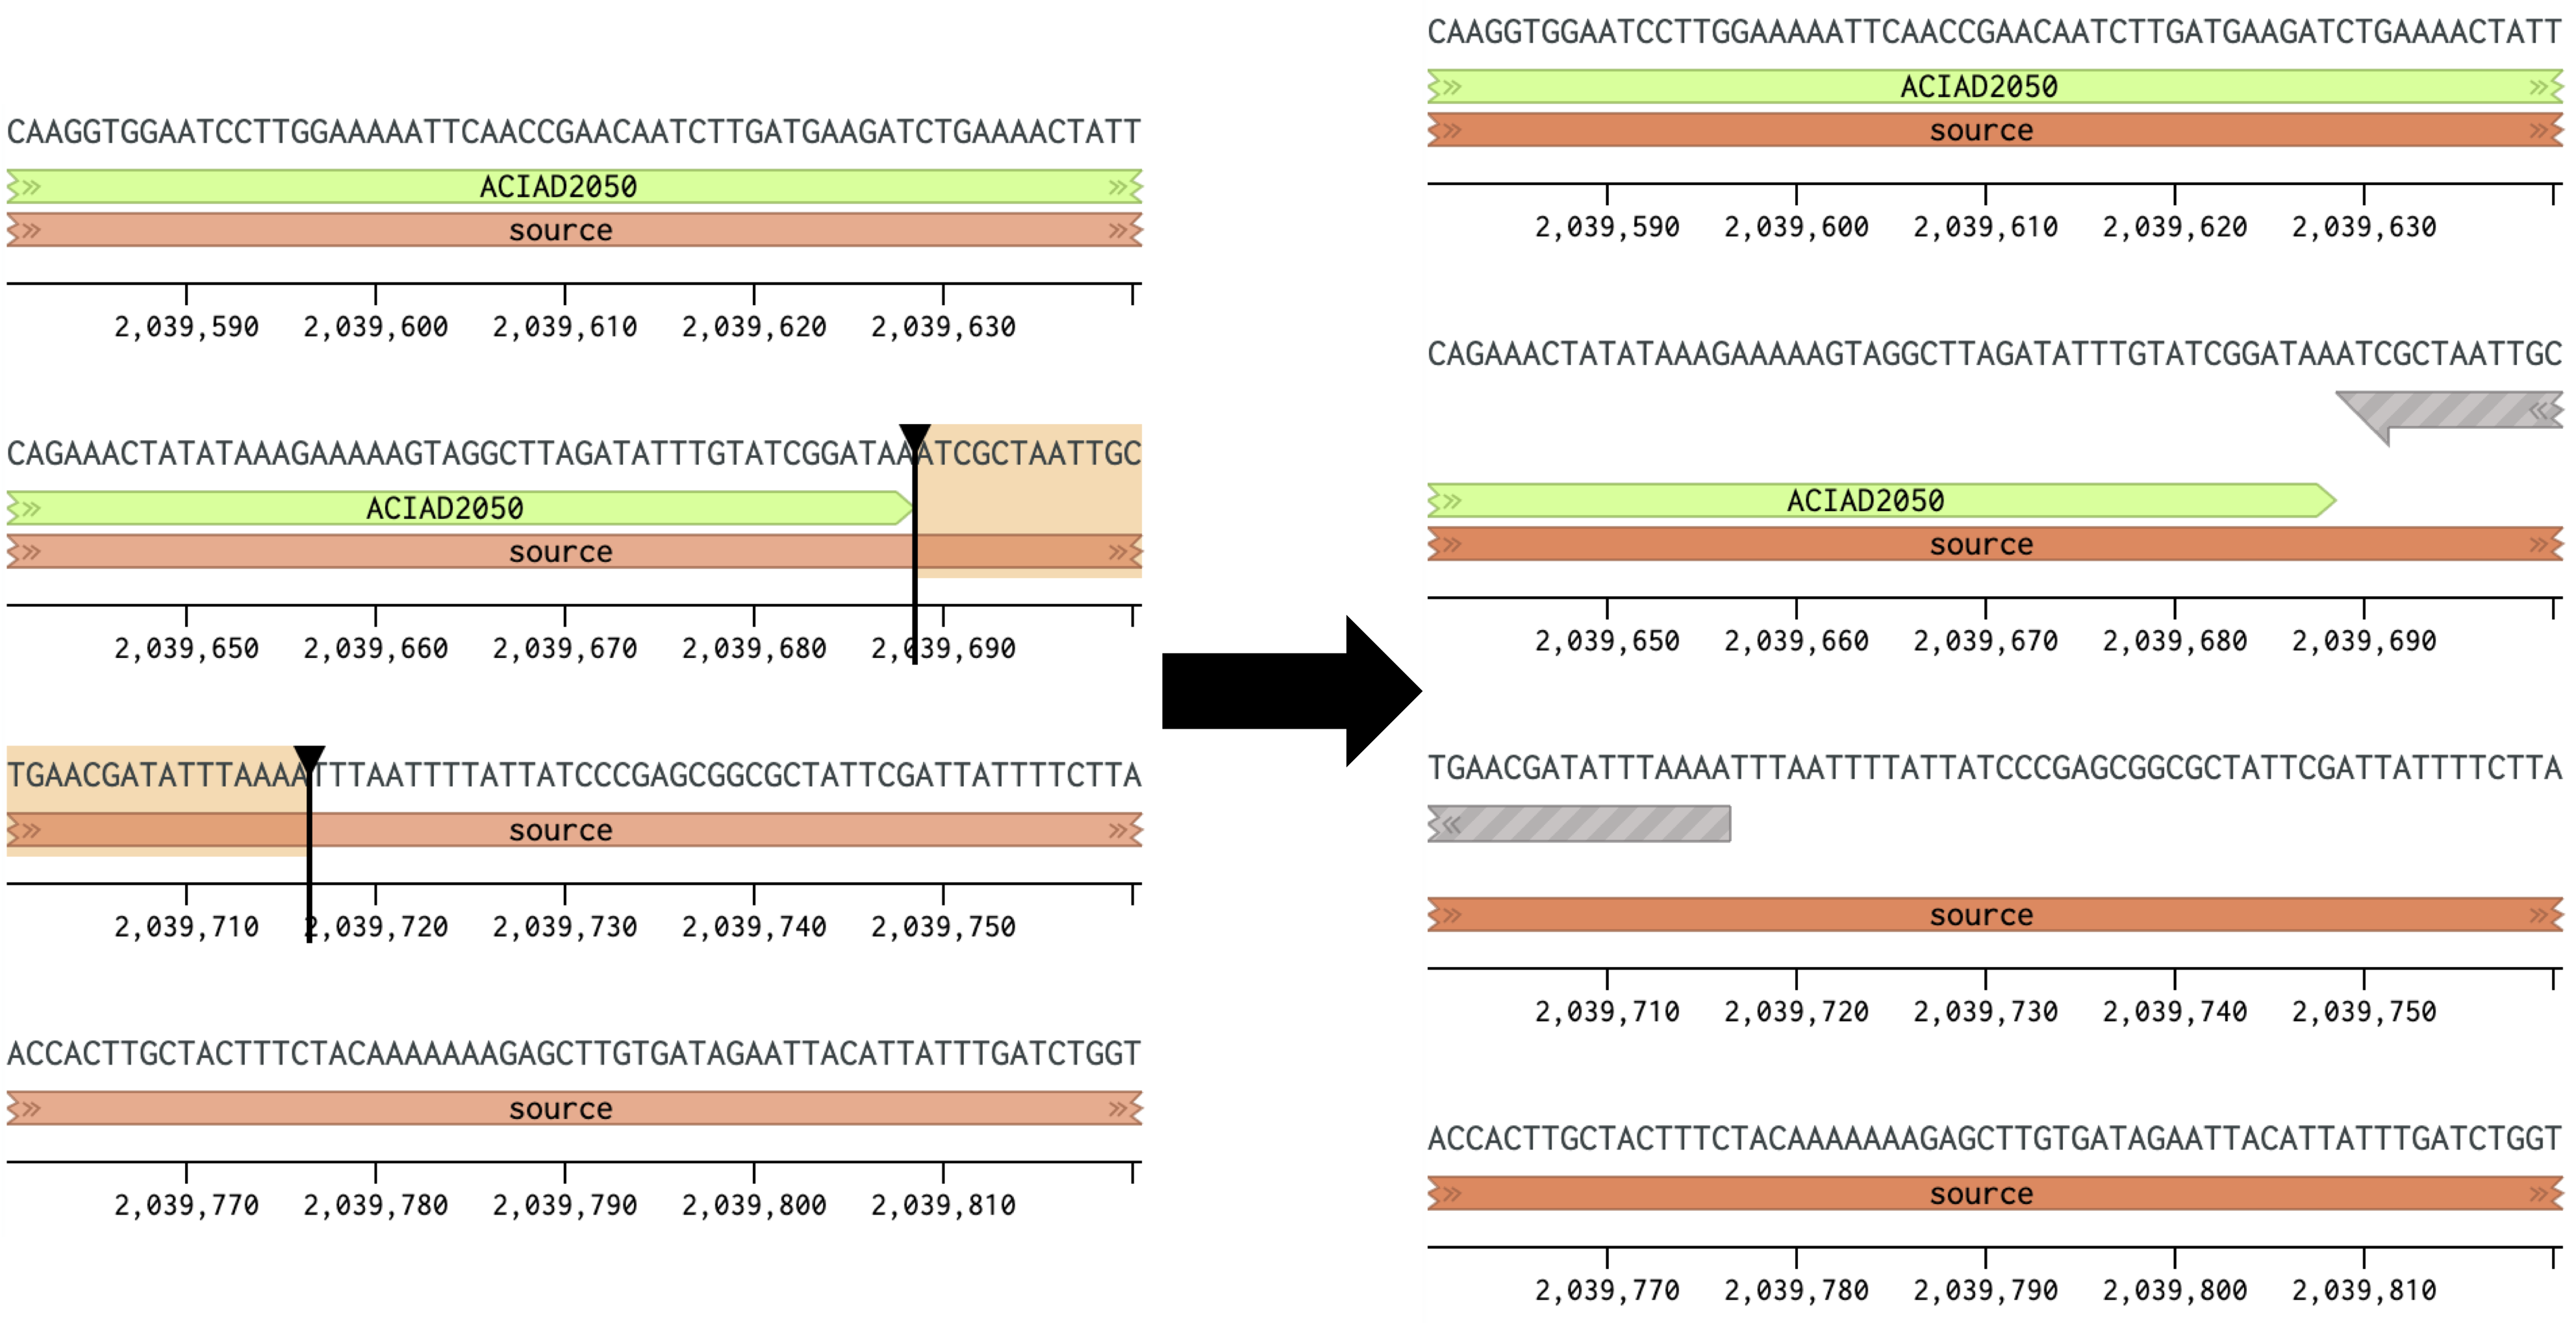
IV. Highlight ~30 base pairs at the downstream end of the fragment you want to amplify. Create a primer as before, but select "Reverse primer" instead (Figure 2).
- Note that this primer is oriented in the opposite direction from the one in Figure 1. For the steps in parts 2 and 3 you will need the primer sequences in the same orientation (5′→3′) for analysis. In Benchling the reverse compliment sequence can be obtained by highlighting the sequence or right-clicking the primer and selecting "Copy special" and "Reverse compliment."
Figure 2 Placing a reverse primer downstream of the ACIAD2049 gene. In this example the primer is placed ~1000 bp downstream of the forward primer from Figure 1.
Note GC content can be a useful guide for choosing a good primer location, as equal base distributions (i.e. ~50% GC) are less likely to form detrimental secondary structures. However, this may not be a realistic guideline for all primers as different genomes and locations (such as near promoters) can vary considerably in GC content.
2) Calculating Annealing Temperatures
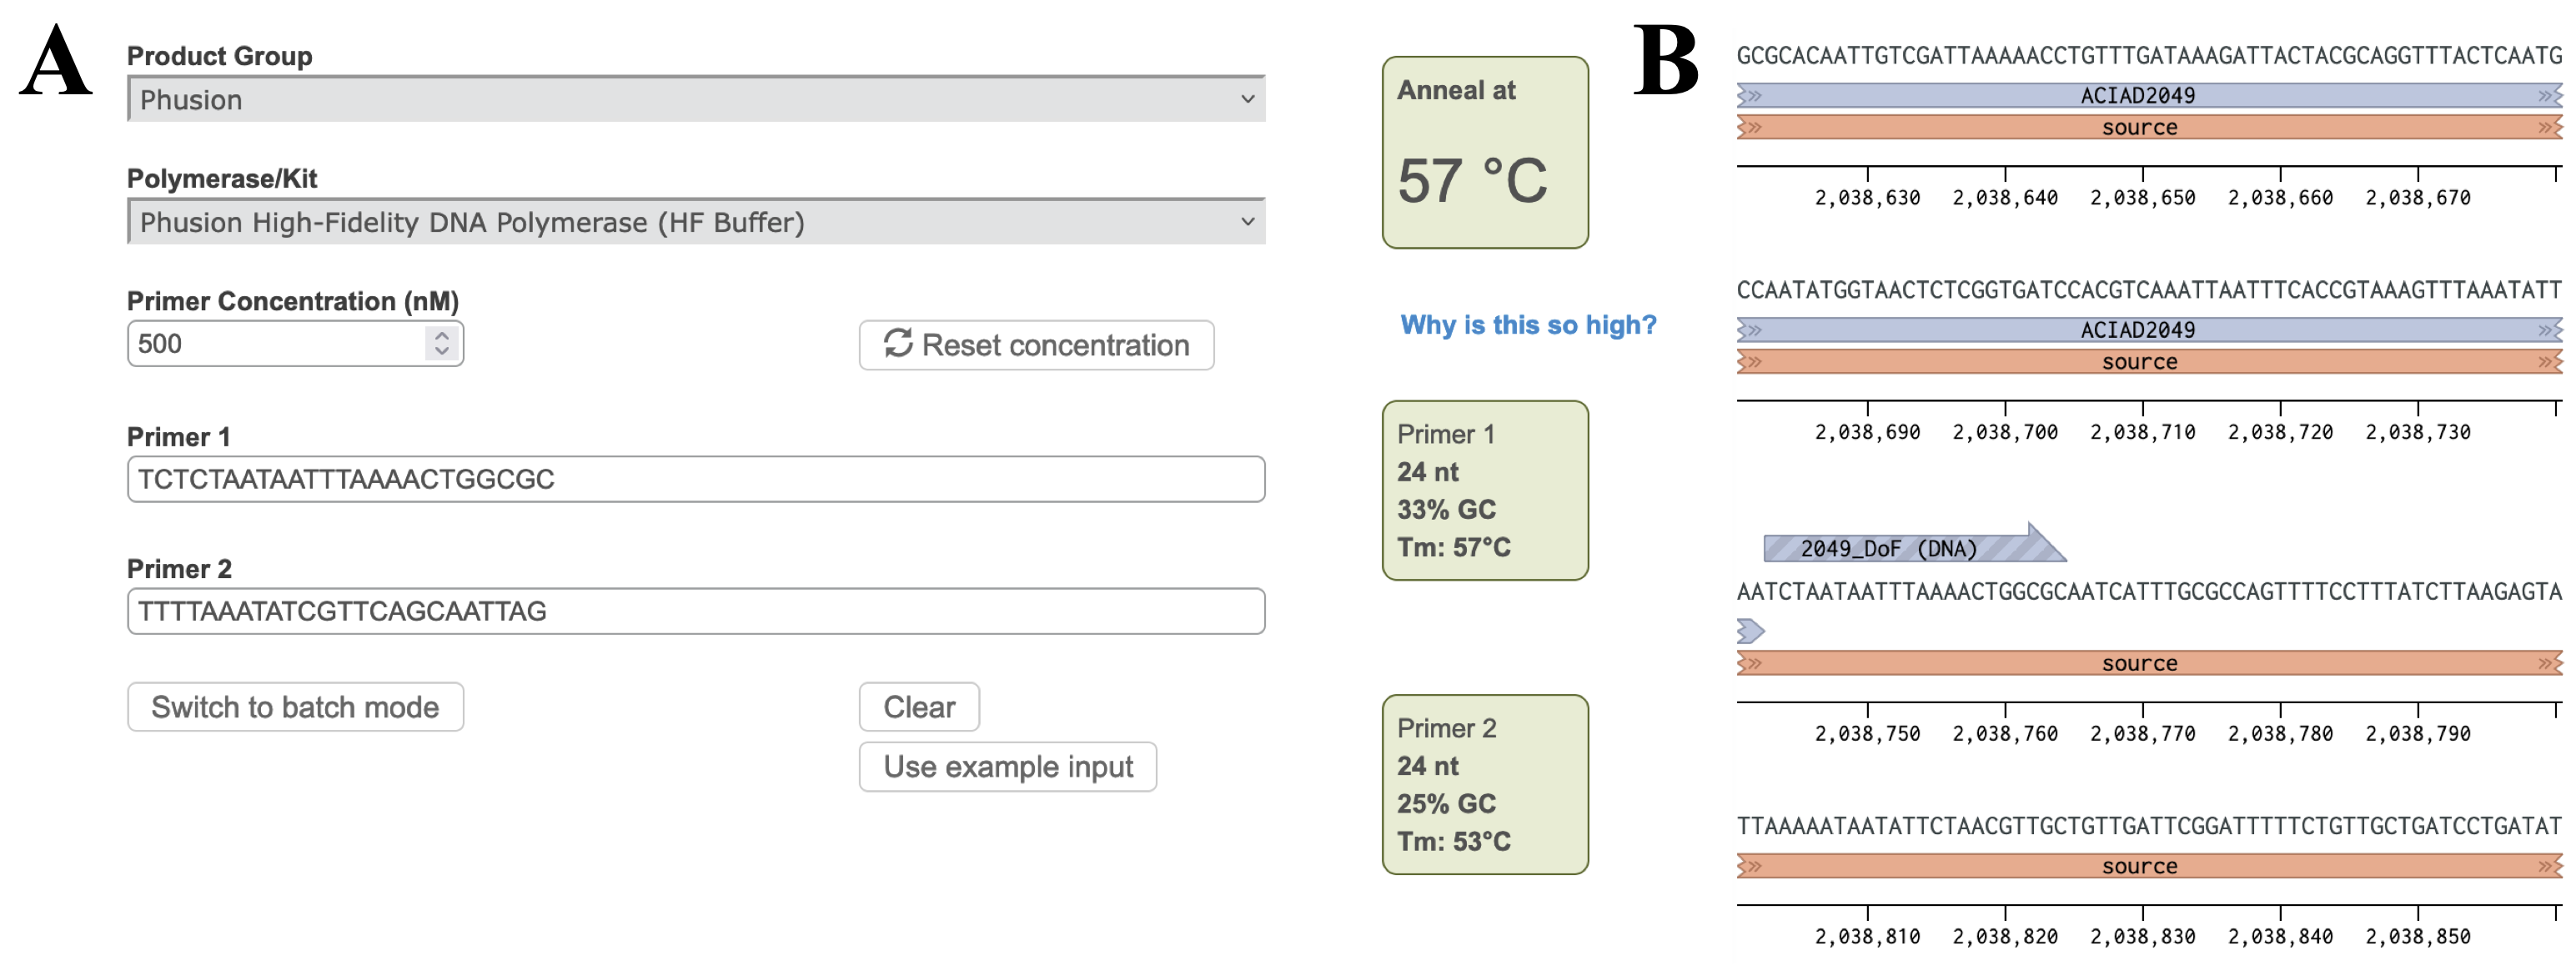
Calculate the annealing temperature for your PCR reaction using the NEB Tm Calculator.I. Select the polymerase for your PCR reaction from the drop-down menu.
II. Copy ~30 bp of the forward and reverse primer sequences into the Primer 1 and Primer 2 boxes.
III. Adjust the annealing temperature (Figure 3A, top right box) by removing bases from the 3' end of each primer until:
- The annealing temperature is in your desired range. For Phusion polymerase this is typically ~57-60°C, but may vary for other polymerases.
- The individual Tms of the two primers (shown in the boxes on the right) are less than 5° apart.
- Each primer is 18-25 bp long. Shorter primers are preferred because they reduce the possibility of forming secondary structures that may inhibit your reaction.
- Having a G or C nucleotide near the 3′ end can improve its ability to bind to the template (known as a "GC clamp").
Figure 3 A) Annealing temperature calculations for ACIAD2049 downstream primers. B) ACIAD2049 downstream forward primer from Figure 1 shortened to account for annealing temperature.
3) Modifying Primer Sequences and Checking Secondary Structures
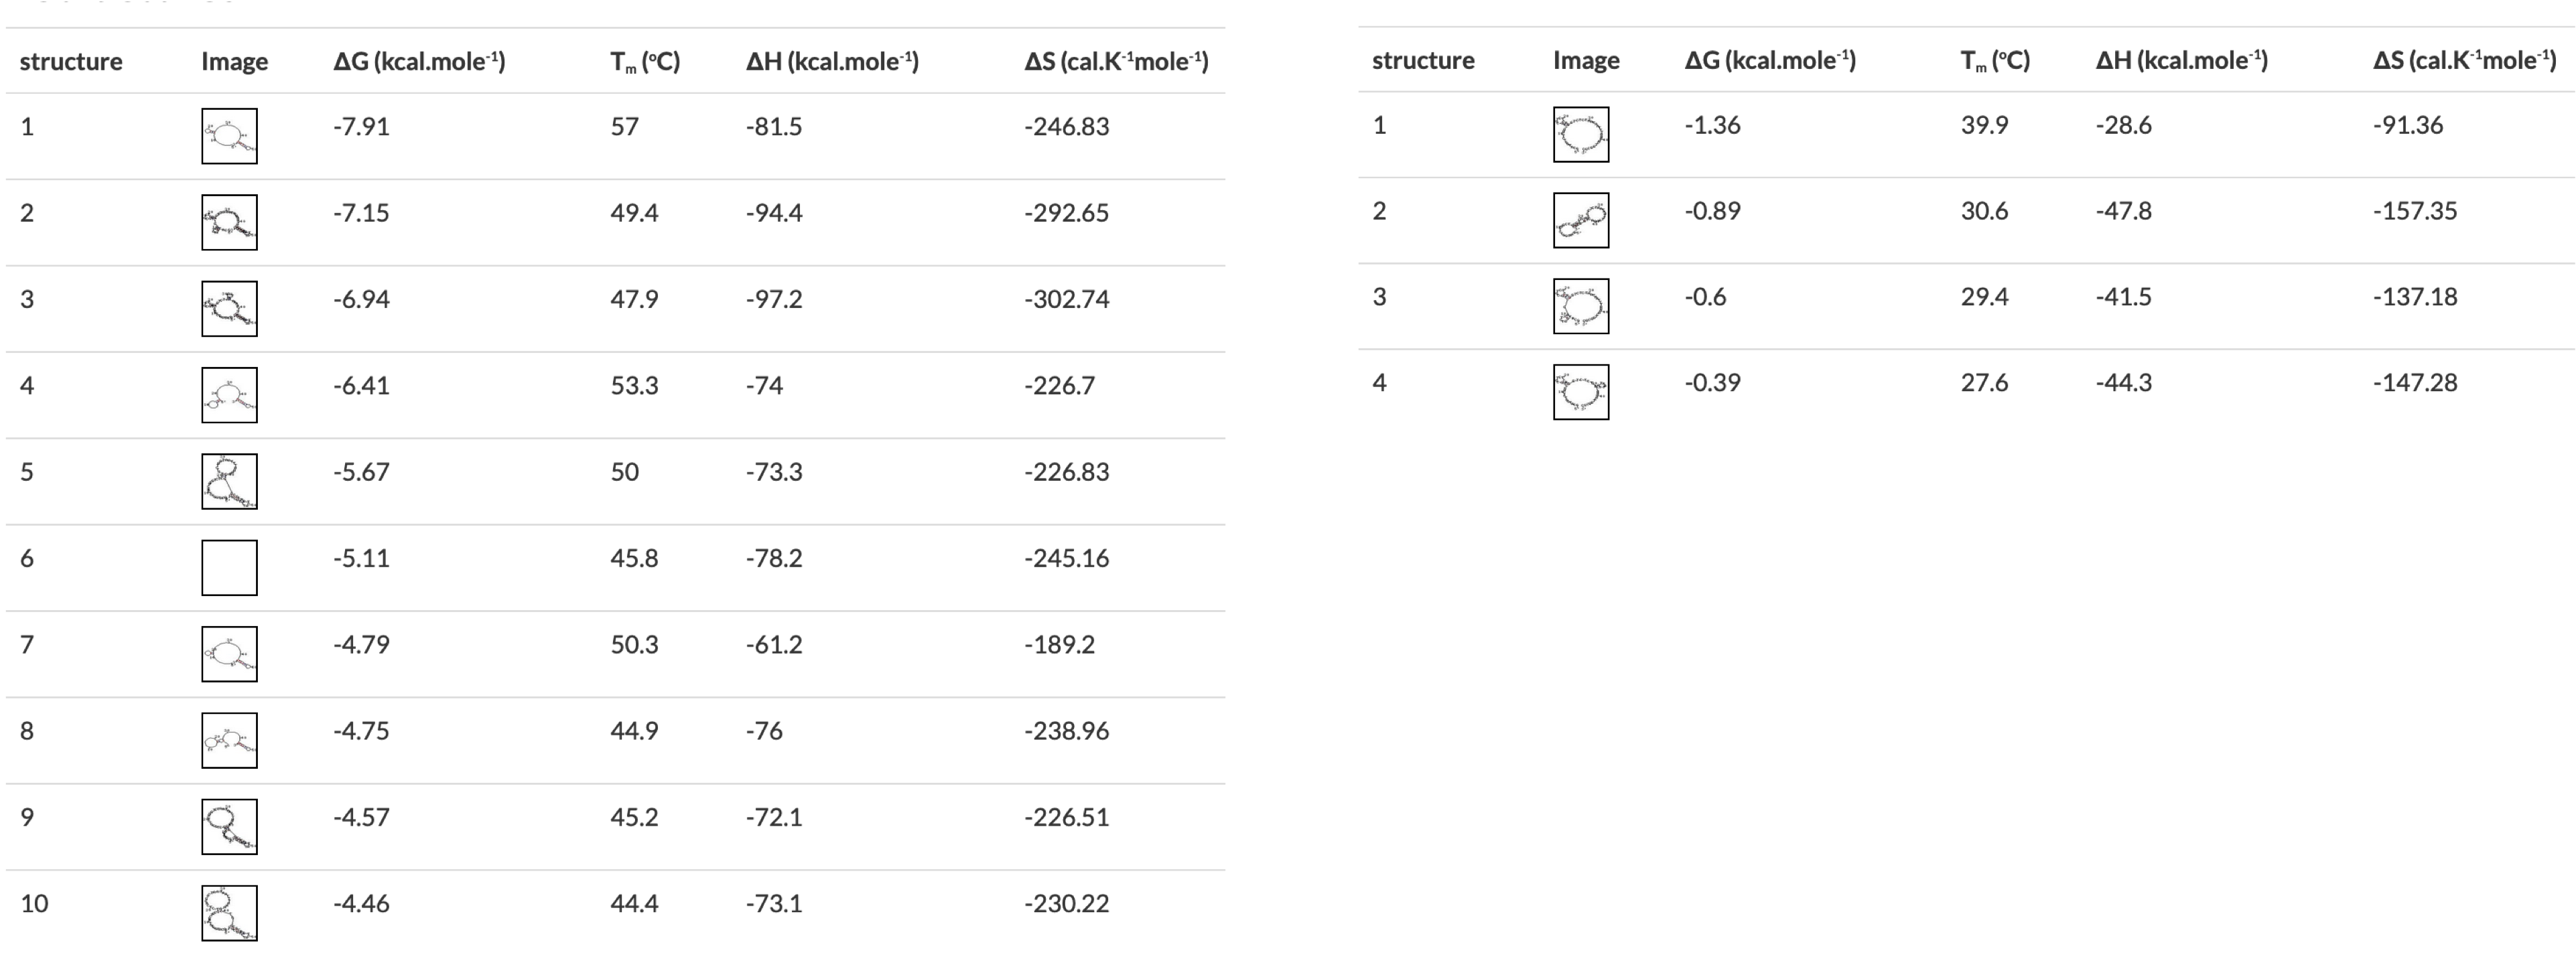
I. Add any additional modifications or adapters to the end of your sequences. Restriction sequences used for cloning need to be added to the 5' end of the primer sequence.II. Copy and paste each primer sequence into IDT's OligoAnalyzer program. Select "HAIRPIN" to analyze secondary structure formations. Structures with melting temperatures (Tm) below the annealing temperature for your reaction will melt in the thermocycler and not interfere with your reaction (Figure 4, left). Note any structures with Tms within a few degrees of your annealing temperature (Figure 4, right).
III. If problematic structures were detected, modify the primer sequence to remove them. Potential solutions include:
- Shortening the primer.
- Relocating the primer binding site to a nearby region of the template DNA (if possible, according to the needs of your experiment). This may be especially helpful if your original target site was particularly A/T or G/C rich.
- Choosing a different restriction site or ligation overhang (if possible).
Figure 4 OligoAnalyzer results showing primers with (left) and without (right) problematic secondary structures. The structures on the right would all melt in a typical PCR reaction, the first one on the left would form in a reaction with a 57°C annealing temperature.
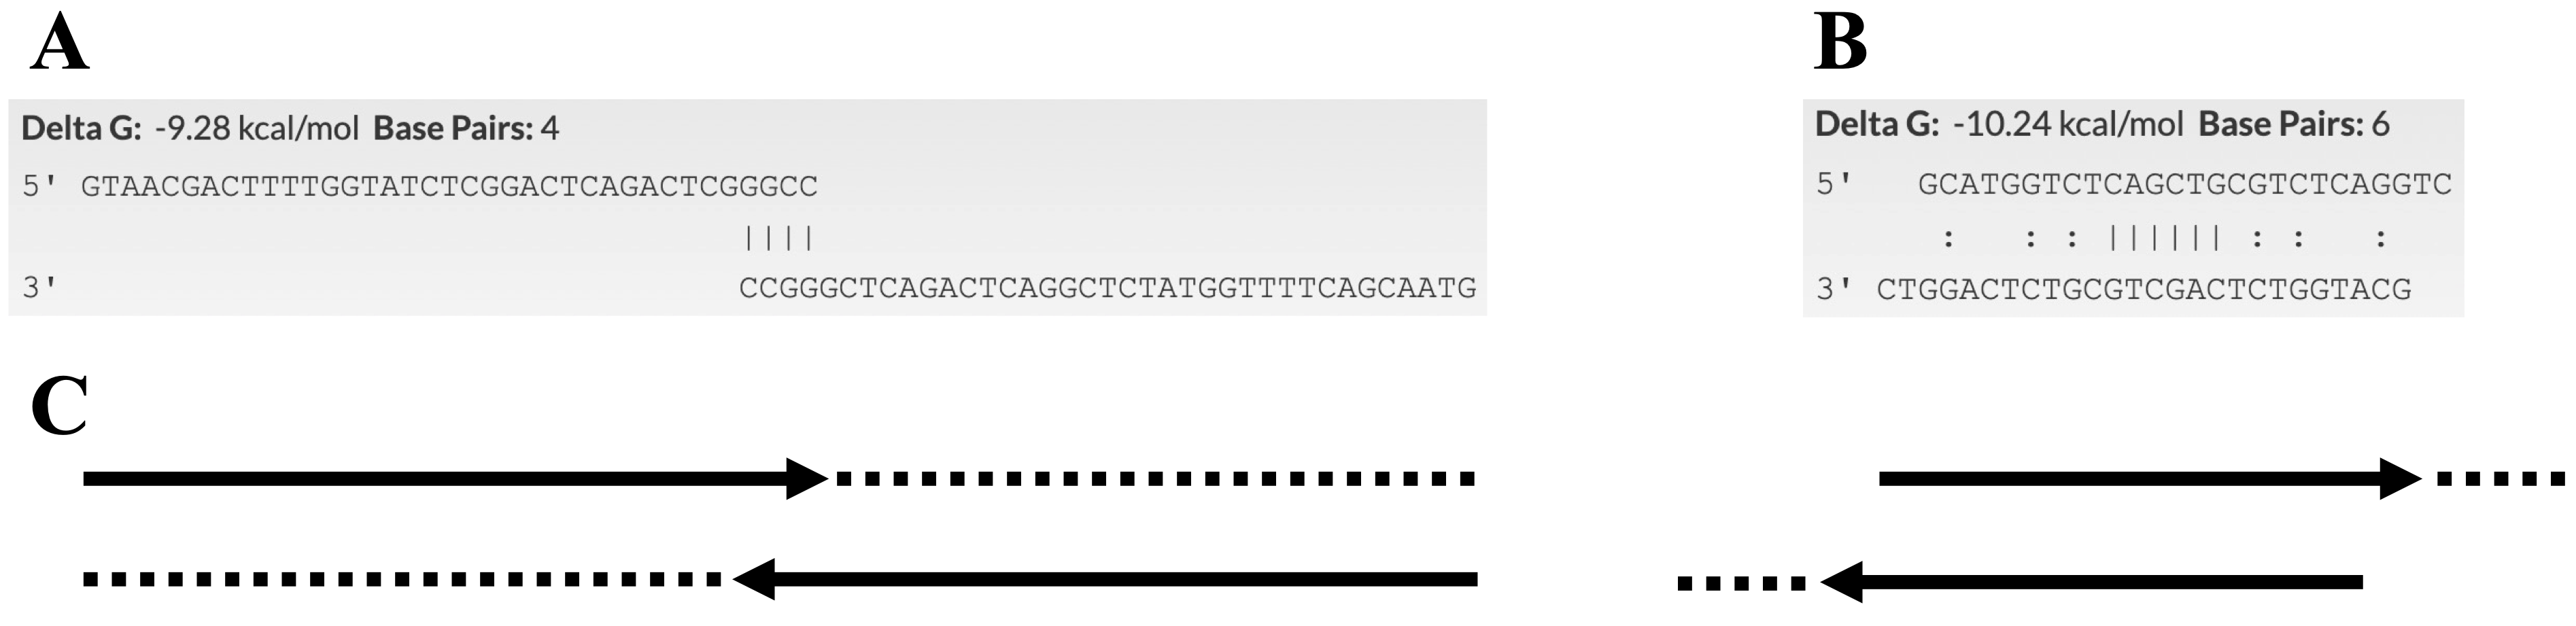
IV. Selecting "SELF-DIMER" or "HETERO-DIMER" in OligoAnalyzer will check for other binding interactions between a primer and itself or another primer, respectively. IDT suggests that interactions with a ΔG of -9 kcal/mol or lower may interfere with PCR reactions, although this is more likely with dimers arranged such that they form primer dimers (Figure 5). If problematic dimers are detected, remove them by following the suggestions in 3.III, above.
Figure 5 Checking for self-dimerization with OligoAnalyzer. In A the self-dimer is likely to interfere with PCR reactions but the self-dimer in B is not. C) Cartoon showing the extension of each primer by PCR (dotted line) resulting in a primer dimer from the primer in A. The self-dimer in B will not be extended by PCR.
V. If you have changed one or both primer sequences you will need to recalculate your annealing temperature as above and confirm that it is still within the desired range (make sure to remove any adapter sequences before calculating your annealing temperature. Use only the sequence that anneals to the template DNA). Add or remove additional bases if necessary to bring the annealing temperature back to the desired range.
Further Reading
Barrick Lab > ProtocolList > PrimerDesignBenchling

 The LTEE
 iGEM team
 NGS course