Gel Electrophoresis
In order to analyze PCR results, the products are run on an agarose gel, which is then analyzed in UV light to ascertain the length of DNA fragments in the PCR reaction.Making the Gel
Most PCRs can be analyzed on a standard 1% agarose gel (1g of agarose per 100 ml of buffer). Changing the concentration can be helpful for separating very large (use a 0.5% agarose gel) or very large size (use a 2% agarose gel). For a standard 1% 50 ml gel:- ) Add 0.5g agarose and 50ml TAE buffer to a 125ml flask and heat in the microwave for 1:30 minutes. While the microwave is running you can set up the gel mold and well combs.
- ) After heating add 2.5 μl SYBR Safe and swirl to mix.
- ) Pour the liquid from the flask into the mold and let it solidify (approximately 20-30 minutes).
- ) Once the gel has solidified, remove the comb, loosen the gel tray, and place the gel into a rig. Pour TAE buffer into the rig until the gel is thoroughly submerged.
Loading the Gel
DNA samples should be mixed with a loading dye before loading. First, gather all PCR products that are to be run, an appropriately sized ladder, and 6x loading dye. The latter two may be found in the 4°C fridge in the computer room adjacent to the gel area. The 1kb+ ladder is a combination 100bp and 1kb ladder which should be appropriate for any PCR sample (100bp ladders are quite useful for samples less than 1500bp, while 1kb ladders are best suited for larger samples).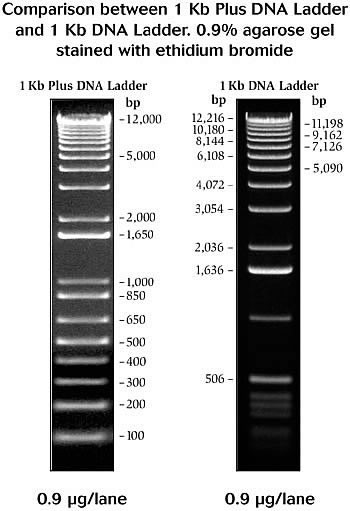 Basic Steps:
 - ) Load 6 μl of 1kb+ ladder into the first well (dye is already combined with ladder)
- ) Combine dye and DNA on a cut out a sheet of parafilm. For each sample pipette 1 μl of loading dye onto the parafilm. Then, mix 5 μl of PCR product into a drop of dye and pipette up and down to mix. Finally, pipette the dye/sample mix into an empty well. Record which lane each sample is loaded into.
- ) Once all samples are loaded, attach the electrodes to the rig with the negative (black) electrode at the top and the positive (red) electrode at the bottom. Start the run from the power unit.
Running the Gel
Steps:- ) Once all samples have been loaded, attach a lid to the rig, and attach the lid to the Bio-Rad power supply (NOTE: always make sure that the current is off or paused before inserting or removing a cords from the power supply).
- ) Set the voltage to 120V and run the gel for about 20-30 minutes (you can set a timer on the machine itself by clicking on the clock logo. The run will stop when the time runs out). It is advisable to check up on the gel from time to time to make sure that it is proceeding normally. The tracking dye should migrate towards the bottom of the gel.
- ) When the gel seems to be completed, pause/stop the voltage, disconnect and remove the lid, and take the gel (in its tray) to the Bio-Rad gel imaging machine.
Imaging and Analyzing the Gel
Steps:- ) Place the tray in the imager and open the Image lab program.
- ) Select Protocol 1, then Position Gel, then OK on filter 2, then center your gel.
- ) Once centered, close the imager door and select Run Protocol.
- ) Modify the image as you see fit.*
- ) Save the image in Documents/[your name]. Note that the program saves files as .scn, which can only be opened by Image Lab and related programs. For a simpler version which can be viewed from any computer, select snapshot, then save a common file type (ex: .jpg). If you want a physical copy you can also print the image.
Gel post-staining
Adding DNA dyes to agarose gels after electrophoresis (post-staining) can be advantageous when very crisp bands are needed (publication, low amount of DNA, etc). Adding nucleic acid dye to the molten agarose can cause slight inhibit DNA migration and bending of bands. Post-staining can reduce bending, increase DNA signal, and reduce background signal Steps:- ) after gel electrophoresis, place gel into small tray
- ) add 15 µL of dye into 50 mL buffer (typically x1 TAE) and add to tray
- ) gently agitate for 30 minutes
- ) Remove buffer+dye
- ) wash gel with ddH2O 2-3 times
- ) image gel
Barrick Lab > ProtocolList > ProceduresStandardAgaroseGel
Topic revision: r4 - 2023-09-19 - 21:15:41 - Main.IsaacGifford